Shooting aerial video
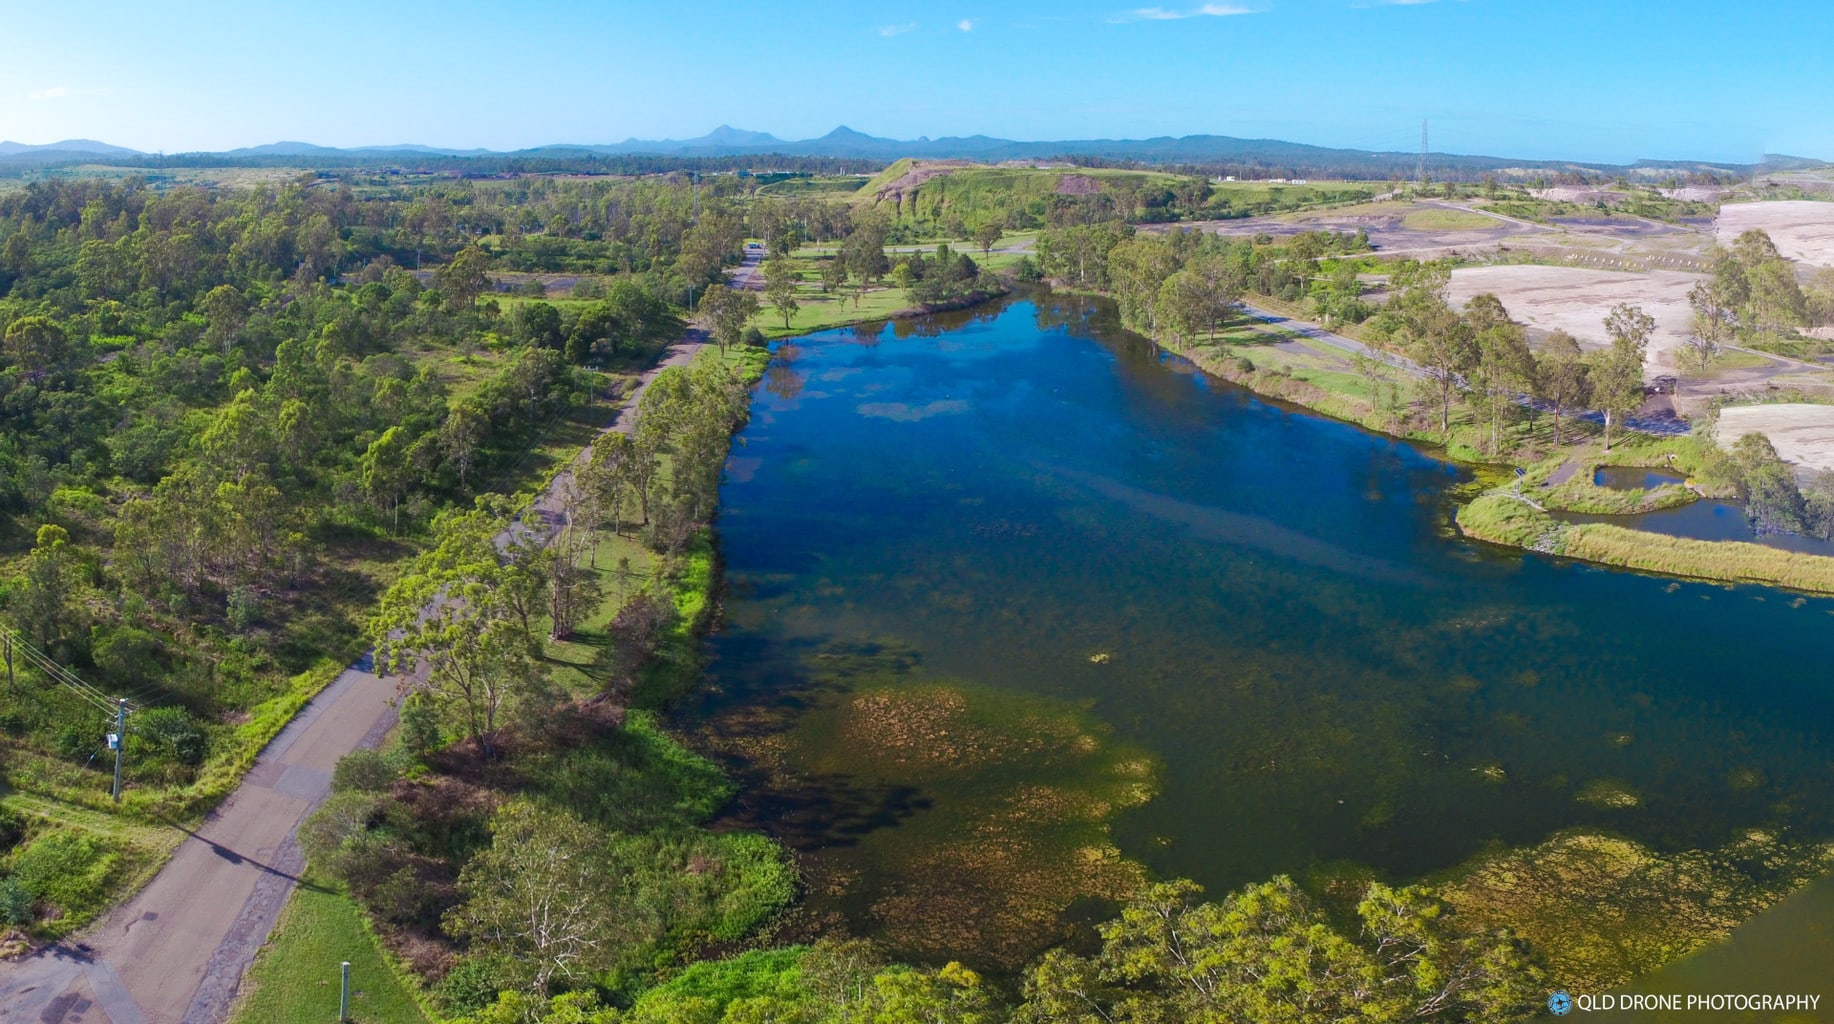
One of the aspects of drone photography I most enjoy and will continue to pursue even if my commercial interests take me elsewhere is aerial video. There’s something incredibly satisfying about planning an aerial videography route, thinking about what I’m going to capture and then comparing that to what I get after I’ve edited and compiled the raw videos … and that’s often a whole lot more than I expected when I shot it. So today I want to discuss what you need to know to shoot aerial video.
Know the regulations
The last thing you need is to be shooting great video only to find a police car or a ranger’s truck or a security guard pulling up and telling you that what you’re doing is illegal. Or even worse perhaps, to publish your great aerial video online and have CASA knocking on your door with an $8,500 fine because you’ve broken the UAV laws.
UAV use in Australia is regulated by the Civil Aviation Safety Authority (CASA) under CASR 101 (Part 101 of CASR 1998) and a host of linked regulations and rules designed to keep airline passengers and the public safe. If you want to know exactly what these regulations restrict, check out 101casr.pdf.
The UAV laws in Australia may seem complex, but in fact we have a lot less laws here than in many other countries. This is my take on those laws, having now obtained my UAV Controller’s Certificate:
- You cannot fly over 400 feet (about 120 metres) in altitude
- You cannot fly within about 5km of an airfield or aerodrome
- You cannot fly within 30m of people (think of a dome with a 30m radius)
- You cannot fly over crowds or populous areas (e.g. city or suburban streets)
- You cannot fly in restricted military or security areas including ports
- You cannot fly beyond your visual line of sight (usually about 500m)
- You cannot fly into a cloud or other visual obstacle
- You cannot fly at night (or later than 10m before last light of the day)
Beyond this, CASA will come after after you if your flight appears to have put people or property in danger of being harmed. There are some exceptions to the above rules in certain circumstances, but to discuss those here would distract too much from the main purpose of this article.
There are a few more things to think about, however, before you plan your aerial video flight:
- If you fly on or over private property you really need the written permission of the property owner (land owner rights extend to the air space above their land as well) or you might be charged with trespassing.
- If you fly in a way that causes people to be concerned about their privacy (if you appear to be spying on them) you could also find the law on your doorstep. While it’s often hard to get a successful prosecution of privacy breaches with drones, you really don’t need the hassle of having to fight a battle like that.
- You can’t fly using your mobile device screen unless you have someone with you who is controlling the UAV by sight. This doesn’t impact you all that much if you plan your flight correctly so you capture motion video while flying from point to point, then pan while stationary. It’s all in the editing.
Learn how to fly your quadcopter first
Don’t expect to just put your UAV or drone up in the air and capture great aerial video. You probably will anyway (at least you’ll think it’s great and so will your mum) but if you learn how to fly your quadcopter well first, you’ll do a lot better.
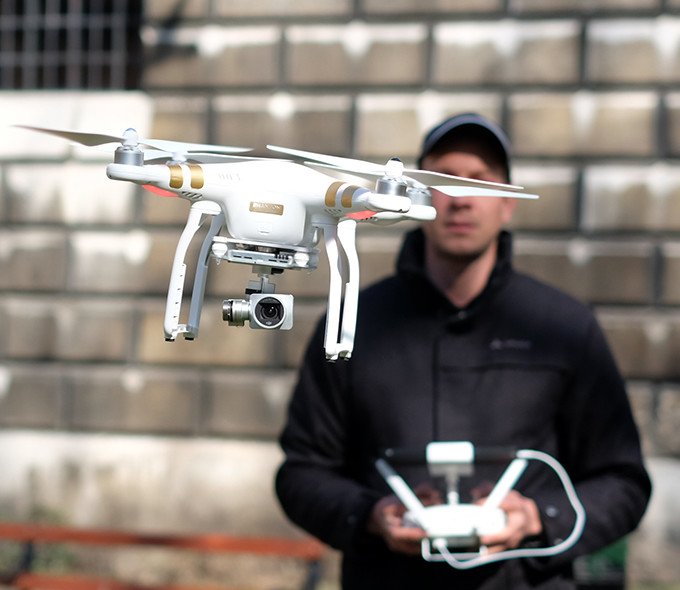
My first few flights with the DJI Phantom 3 Professional UAV were shaky and poorly controlled, with my mind so occupied by not crashing this expensive piece of equipment that I had little spare capacity to plan my flight path, think about the best angles to capture scenes or make smooth, considered movements. It all gets much better when you know your equipment well.
By the way, if you don’t fancy spending $1699 on the Phantom 3 Professional right up front like I did (in fact I spent $2200 but let’s not talk about that), consider starting out with the DJI Phantom 3 Standard at just $859 with free shipping from DJI direct. It has the same 12MP still camera and a 2.7K HD video camera which is more than enough for non-professional use. It has the same gimbal stabilisation and a live video feed to your tablet or phone while you’re flying. And you won’t have to worry as much as I did about the cost if something goes wrong!
Although you’ll want to share and brag about the amazing images your drone is capturing from 100 metres in the air, trust me when I say that if you take the time to learn how to fly your UAV properly to the point where flying it becomes second nature, your images and video will improve beyond belief because you can focus on them so much more. In fact it’s better for the first few flights with your DJI Phantom to forget photos and video altogether and just focus on flying safely.
If you need more incentive to learn to fly before you learn to shoot photos and video, watch the video below of a guy experiencing his second flight with a DJI Phantom, thinking he knows what he’s doing and can capture some great footage, but finding everything that could go wrong does go wrong.
Choose your quadcopter well
I’ve mentioned the DJI Phantom 3 a lot in the last section and that’s because that’s what I currently fly and I trust it a lot (not totally, but a lot). Because it’s GPS-enabled it knows where it is in space and you know where it is because it’s showing on the map on your video screen all the time. It also has a great “return to home” feature that brings it back to you if it loses signal or looks like running out of battery or if you just lose confidence and want it safely back (which I did a couple of times at first).
But the Phantom 3 is not the only good quadcopter out there. There are quite good drones being sold by companies like 3DR Robotics (3D Iris and 3D Solo), Parrot (the Parrot AR) and Yuneec. I’ve not flown any of these enough to form an opinion of them, so I’ll talk about what I have flown.
I started learning to fly with a Syma X5C that cost me about $60 and although it was incredibly basic it could shoot 720p video and fly up to 200m away from me. I could also just let it fall from the sky onto grass and it would not suffer any damage. If it hit someone it would probably have scratched them up, but not caused any major harm. But it had no GPS, no return to home, nothing to stop it flying off into the wild blue yonder when it lost signal (and that happened to me a few times).
When I got a bit more serious about shooting nice photos and videos during my flights, I upgraded to a JJRC Tarantula X6 and bought the camera from a DJI Phantom FC40 (720p wifi camera) to hang underneath it, giving me a form of first person view while flying (holding my phone in one hand and my remote control in the other). The X6 could easily fly 300-400m away from me and I would almost lose sight of it, panic and fly it backwards to come home. It had a basic return to home function called IOC which really meant pulling the control stick back would make it come towards home.
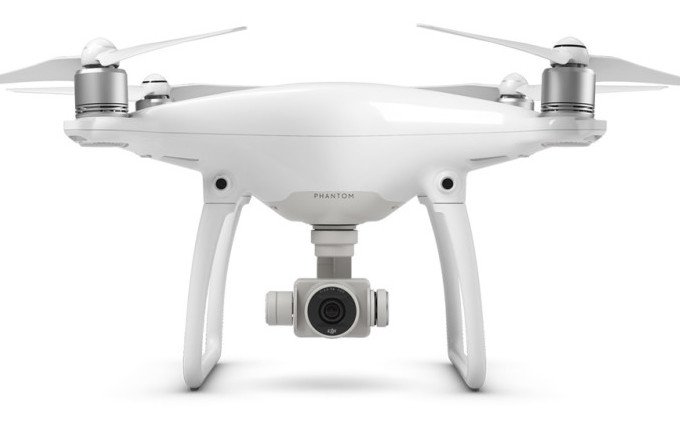
If I was graduating from the X6 now instead of a year ago, I’d be looking very seriously at the new DJI Phantom 4. At $2399 it’s definitely not cheap but I think it is probably a good investment because it has something the Phantom 3 doesn’t have which would have saved my bacon at least once … collision avoidance detection technology. It has two small cameras that face forward looking for obstacles in the flight path and if it thinks it’s going to hit something, it will pull up quickly. It just makes you feel a bit safer when you put $2000 worth of drone up in the air.
Know your camera settings
Drones like the Phantom 3 and Phantom 4 have very good automatic camera settings, but shooting in auto is not going to result in the best aerial video footage. You have to get to know your manual camera settings and how to use them to best advantage given the lighting conditions and what you’re shooting.
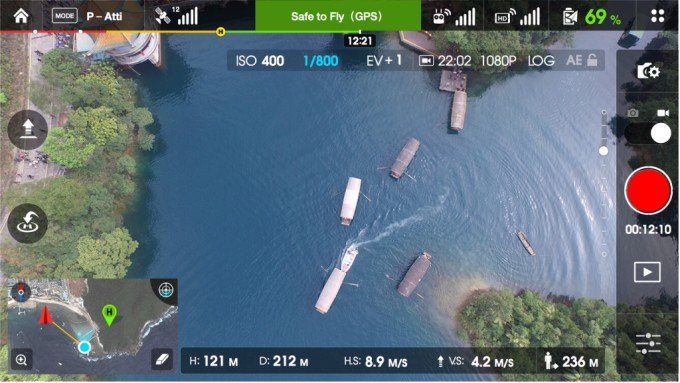
What you’re looking at above is the controller view from a DJI Phantom and you’ll see at the top right of the viewfinder area there’s a row of camera settings (ISO 400, 1/800, EV+1, etc). These are the manual camera settings and what you’re seeing in the viewfinder is what your camera is seeing with those settings. If you’re familiar with DSLR cameras you’ll understand these easily, but if not you would do well to search some tutorials on YouTube.
There are a lot of settings you can play with to get better aerial video with the DJI Phantom, but after much trial and error I’ve pretty much settled on:
- White Balance – Auto (it does a good job)
- Resolution – 1920 x 1080 (I also shoot in 3840 x 2160 too if the scene really warrants it)
- Framerate – 24 FPS (unless I’m shooting action video, in which case I use 60 FPS)
- Colour – LOG (because I adjust colours in post-processing before compiling the videos)
- ISO – as low as possible (usually ISO 100 unless the sky is very bright)
- Shutter speed – double the frame rate, so usually 1/50 or 1/120
- EV – usually about -2 because I prefer to under-expose rather than over-expose
Before I start filming, I will turn on the “histogram” function in the Phantom 3 camera so I can see which parts of the scene might be over-exposed and I might adjust down even further.
I always use a filter on my camera too. I use a polarising filter for low light situations like sunsets, an ND4 natural daylight filter for normal daytime filming (you can’t really shoot 24 FPS at 1/50th without an ND filter) and an ND8 or ND16 for really bright scenes like at the beach.
Use a pre-flight checklist
In the excitement and thrill of flying a quadcopter and capturing amazing imagery it’s easy to overlook something serious and find it’s all going wrong. That’s why I created a checklist that I use before and after every flight, to make sure I haven’t missed anything.
Some of the things on my checklist include:
- Do I have a safe take-off and landing zone?
- Are there any powerlines nearby that I may not easily see?
- Are there people or dogs nearby who might wander into my flying area?
- Is the battery locked in and fully charged?
- Are the propellers firmly locked onto the motors and in good condition?
- Is the SD card inserted into the camera and does it have plenty of space?
- Has the locality map loaded and the home point been set on the map?
- Does the compass need to be calibrated?
- Have I got plenty of satellites to lock onto (usually look for more than 10)?
- Has the gimbal lock been removed from the camera?
- Is the wind (including gusts) below 20 km/h?
- What’s my plan if I need to land quickly?
Plan your flight path and your camera angles
You can do a lot in post-flight editing to cut out bits of video where you turned too quickly or the sun flared your lens or you did something wrong, but what you can’t easily do afterwards is replace the bits of video you really wanted and didn’t capture, or captured badly.
In the video above, which is one of mine, the scenes and camera angles are all pretty good and overall I’m not unhappy with what I captured. But I am unhappy with the colour of the water in the river. This river is typically pretty brown because it’s tidal and mud gets washed up and down the river all day. But if I’d chosen the time of day better I’d have had the sun reflecting the sky on the water and it would have looked much more blue.
In this video the body of water is also fairly brown but I managed to catch the sky and clouds in reflection in the water so you don’t notice it so much. What this video lacked was good planning of the approach and turns. I over-rotated a couple of times and I could have flown in much lower which would have looked far more dramatic.
This video shows a lot more pre-flight mission planning and thought about what my (largely uncontrollable) subjects were likely to do as I flew over them. The time of day was such that I could get nice sky reflections in the water from almost any angle. And the water was shallow enough that I could jump in and retrieve my precious bird if it fell into the lake.
Fly the plan before you shoot
Once you’ve planned your flight route and the angles you think will work best, fly through it and see if your approaches, departures and turns are going to create enough good video to really capture the motion and the drama of the scenes.
There’s nothing worse than thinking you have a great shot and finding out in the editing that something wasn’t planned or executed correctly and you can’t use it. You’ll also quickly see if the light conditions are what you expect them to be and if you’re getting the right reflections to enhance your scene.
Fly to the spots where you think you’ll get the best video footage and slow pan around to see what you can capture. Try different heights too as these can make a major difference to the scene. Make notes as you go to create your final mission plan.
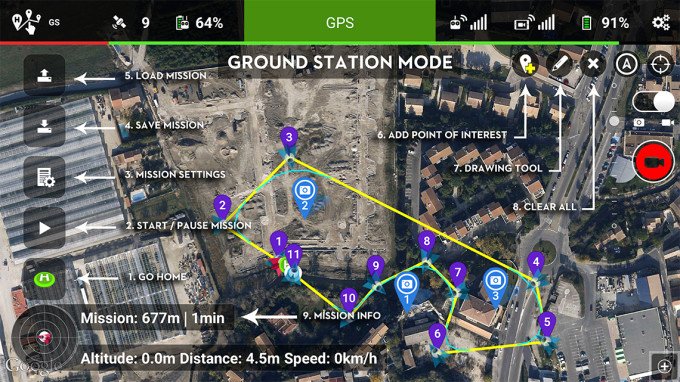
If you’re flying a Phantom 3 or 4, you can use your fly-through to set waypoints that the drone can automatically fly when you’re shooting the video. This leaves you free to think about the best shots and camera angles.
There are 3rd party mission planning applications like Litchi and Autopilot that allow you to fully plan a flight before you ever leave the ground. These tools allow you to work out your flight path, turn points, camera angles, heights and a whole lot more, then fly them automatically so all you need to do is start and stop the camera. You can even pre-plan when the camera will start and stop filming for each leg of the flight.
Think about your battery life and the weather
Your quadcopter battery has a specific flight time capability and you’re going to want to get it safely home before the battery gets too low. Thankfully on the DJI Phantom 3 and 4 there are settings you can modify to warn you that the battery is getting low (say 30%) and critical (say 10%).
But nothing beats planning! I recently heard about a guy who flew nearly a kilometre out to see from the beach with a tail wind to get a beautiful shot of a headland area, only to find he’d used half his battery on the outward flight and was facing a headwind coming back. I think you can put the rest of that story together yourself.
The weather may look great when you’re getting ready to fly and even when you launch, but it can change quickly and you don’t want to be caught out with the drone half a kilometre away when the wind starts gusting up to 30 km/h or more as a storm cell rolls through. So use good weather apps to monitor local forecasts and keep an eye on the sky during your flight.
Try not to fly in any kind of rain or fog as it will do harm to your quadcopter. Even light misty rain or sea spray will get into the electronics and weird things will start to happen.
While I think of it, stay away from high tension powerlines too! They mess with your GPS signals, your compass settings and the all-important IMU (the flight control system) and things will go wrong, usually quite dramatically.
Learn some advance flying and shooting techniques
There are some really good videography techniques that will quickly make you look like a seasoned professional. Have a look at the video I shot at College’s Crossing for some ideas.
One of the most basic is called the “bomb” or the bird’s eye view. This is when you point your camera straight down at the ground and move very slowly over a scene. You can also slowly rotate your aircraft around the scene while the camera is pointing down.
Another is called the “slide”, which is when you start just outside where your subject is located and slide through, with the subject coming into view, across the view and disappearing to the side very slowly.
A third, but somewhat more difficult manoeuvre is the “fly through” where you find an interesting space between two structures that a quite close together and fly through it, revealing the scene as you come out the other side.
Reveals in general work very well. I use all kinds of objects to mask a scene as I take off and reveal it as the object is cleared. Trees, bushes, buildings, hills, signs, etc. all work well.
I also like to use orbits, where I focus the subject in the centre and fly the drone around the subject keeping them centred in the frame throughout the flight. You need a lot of practice to do this manually, but there are some good apps like Autopilot that will help you do it automatically. If you put the subject to one side of the frame and show background as you rotate around them it looks even more dramatic.
I hope this was of some use to you and I’d welcome you sharing your thoughts and tips in the comments below.

Leave a Reply
You must be logged in to post a comment.